~by Nikki
Currently there seems to be a shortage of canned pumpkin due to the summer heat and its affects on the pumpkin crops. We’ve heard from fellow Pouchers that when they do find canned pumpkin, it is more expensive this year than in the past (if you’ve found a good deal, please post in the comments so others can find it too!).
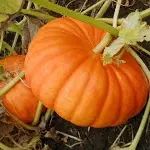
It is a little known fact that you can roast any pumpkin. I didn’t believe that at first. I’d always been told that you couldn’t roast carving pumpkins. A few weeks back I was at the farmer’s market (what a magical place!) and they had pumpkins out and I asked if they were for carving or cooking. The woman manning the table looked at me quizzically and said, “same difference.”
I raised my eyebrows…intrigued. She gave me some very simple instructions on roasting a pumpkin and extracting the “meat,” which I tried…and it worked! I now have a good supply of pumpkin for my protein shakes. So today, I pass this knowledge onto you.
Sorry there are no pictures. I will add some this week as I have another pumpkin to roast that I plan to can up! In fact, I plan to buy a pumpkin a week until I have enough stored for all my pies, protein pumpkin bread, protein shakes and whatever else I need!
Nik’s “fool proof” method to roasting a pumpkin
Step 1: You’ll need a baking pan. Pumpkins are gourds. Gourds have a LOT of water in them. You can choose to roast your pumpkin dry or add a little water to the pan to soften the outside of the pumpkin further (your choice), but either way you need a pan because the pumpkin will release some water as it roasts.
Step 2: Pre-heat your oven to 375 degrees. Cover your baking pan, with the pumpkin inside of course, with aluminum foil (it’s ok for the stem of the pumpkin to poke out of the top. If you want you can trim it before hand. Depending on the size of the pumpkin, you might have to adjust your oven racks.
Step 3: Roast for about an hour for a medium sized pumpkin (3-ish pounds). For a large pumpkin let it go about 90 minutes. But check on it. When it is ready, it will be easy to fully penetrate the skin and the pulp with even a butter knife.
Step 4: (Speaking from experience) Let the dang thing cool off! Burned fingers are not fun. But drain any liquid from the pan. The pumpkin will re-absorb some of it and you will get mushy pumpkin meat.
Step 5: Slice pumpkin in half (or quarters or however many pieces makes it manageable for you to handle it). Scoop out the stringy inner pulp and seeds. They should be a darker color than the edible meat of the pumpkin. Then, in a separate bowl, scoop out the edible part (which should go right about to the skin).
You can refrigerate the pumpkin at this point or use immediately anywhere you’d use canned pumpkin. I am not sure how long the pumpkin keeps in a regular storage situation as I always can mine for long-term use (or we just eat it so fast it doesn’t go bad!). Again, anyone with insight is welcome to post their knowledge!
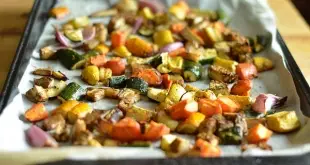
And to get you inspired about what to do with your newfound pumpkin bounty, here is a super yummy recipe to get you started.
Here’s hoping the canned pumpkin production gets back on track. Until then, be empowered! Take charge of your pumpkin consumption and get to roasting!
 Bariatric Foodie Play with your food


Here in Australia, we cut and gut our pumpkins before cooking, then roast the pieces. We don’t have canned pumpkin here so we rarely would can it. Never thought to cook it whole.