NOTE: This post was originally composed right after Thanksgiving, but this recipe is good anytime, especially during the cold, cold winter!
If you’re anything like me, you are in one of two situations at this point after Thanksgiving:
- The turkey is all squared away. Your family has eaten as much as they want right now. You’ve made stock. Maybe a few other leftover remixes, and you’re good.
- Or…(and this was me more years than not in the past) you found you bought too big of a bird, you’re sick of turkey, you want to chuck the thing, but in the back of your head is that little voice admonishing you about starving people in developing countries.
I would say, surprisingly, this post is for both of you!
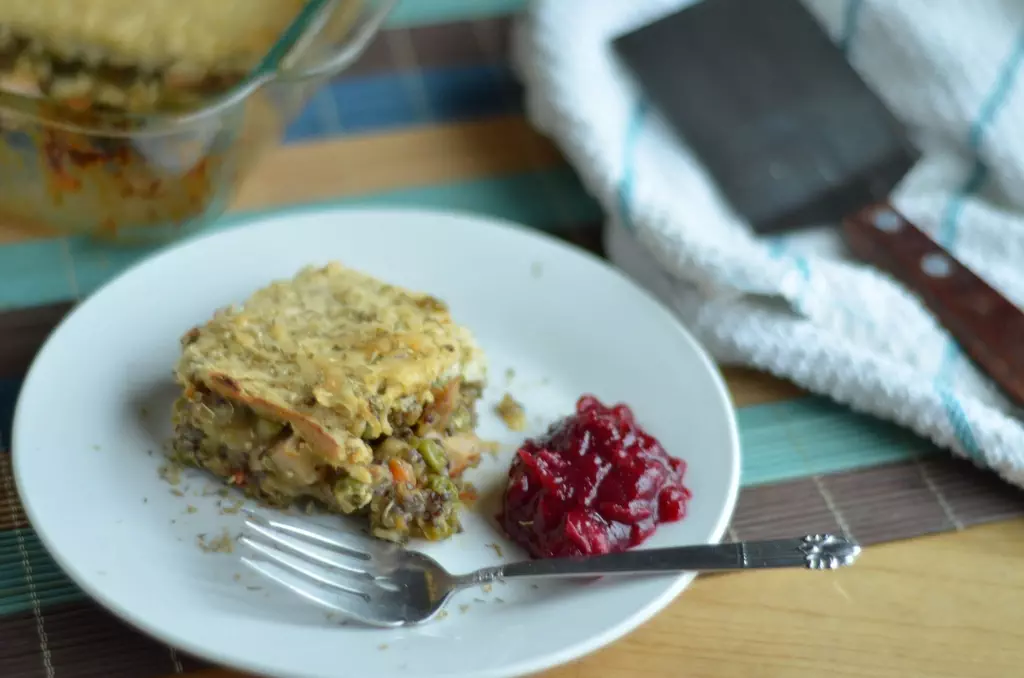
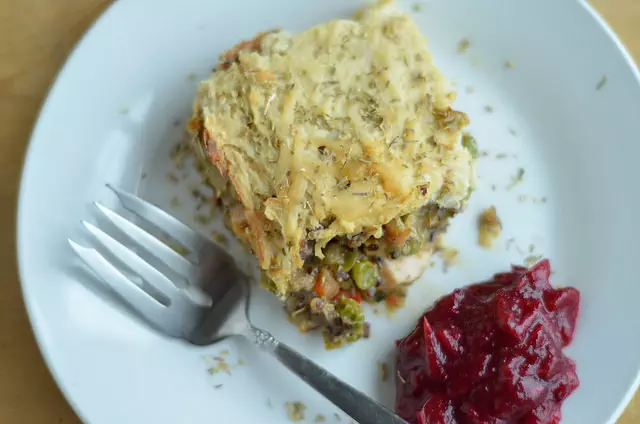
What you see above is what I made with the leftovers I had in my fridge (which, admittedly, weren’t many as I went out of town for Thanksgiving but I did cook a lot for the blog and those leftovers were sort of hanging out not doing much). But I wrote the recipe so that you can also make it from scratch for dinner or to freeze for a taste of Thanksgiving later on in the winter.
But what I really want to talk about is the crust.
You guys??? Cauliflower is so versatile! I love the stuff. And the more I work with it, the more things I learn to do with it, the more convinced I am that I have very little need for flour in my life at all (I won’t lie…I do love the occasional biscuit though and I’ve yet to find a starch I like to make biscuits as much as I like good ol’ white flour).
S’anyway…getting back to business. If you have made cauliflower crust pizza (of which there is not yet a recipe here on Bariatric Foodie), the concept of the crust should be familiar to you. It’s no different from what you’d usually do. If you are new to cauliflower crusts, let’s talk.
When you cook cauliflower and mix it with things like cheese and eggs, and then bake it up? It takes on a starchy quality that can substitute for so many things! I’ve seen such things on the internet as cauliflower tater tots, cauliflower hash browns, and, of course, cauliflower crust pizza.
So when I was looking over my leftover stash, thinking of what to do with it, my first thought was that I could make a “Thanksgiving Shepherd’s Pie.” Not a bad idea. But then as I was Pinteresting for inspiration (do you guys do that too?) I came across one of those really neat cauliflower ideas (I think it was the hash brown) and I thought to myself, “Self? Wouldn’t cauliflower totally work as the upper crust of a pot pie?”
Now I’m not saying this was a totally original idea. If you Google it, probably a gamillionty-seven people have had this same idea! What I am saying is the idea was new…to me.
When using cauliflower in place of either flour or potatoes, I have learned a few helpful tips, which I’ll share with you here:
- Boil “the mess” out of that cauliflower! Not to complete mush, but it should be extremely tender, especially if you are starting from an actual head of cauliflower. Good news is cauliflower doesn’t that long to cook.
- If you have it available, start with riced cauliflower from the freezer section. It just makes the whole thing go faster, plus it cuts down on the cooking time.
- Strain that cauliflower! Just like with zoodles, it’s important to remove excess moisture or the recipe just isn’t going to work at its best. In many cooking videos folks seem to like to use cheese cloth. I use a simple mesh strainer and a spatula. Do whatever works for you, but strain that cauliflower!
If you stick to those tips, you should get a good result.
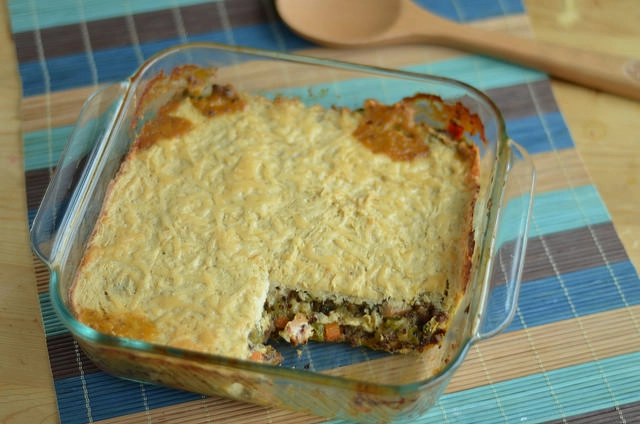
Now if covert cooking (aka cooking in healthful ways that to fool your family either visually or taste-wise) is important to you, my additional tip is that when you cook this, make sure you cook it until the crust is browned to your liking. It has cheese in it so it should, in fact, brown eventually. And the more brown you make it, the “crispier” it gets, which all lends itself toward feeling more like a flour crust!
Lastly, I wanted to say that from my experience, this freezes wonderfully. You can either cut it into portions and freeze it (using whatever method works best for your freezer) and reheat in the microwave or you can make an entire casserole and freeze it (again, do that in whatever way has worked best for you in the past). I am going to make another of these to freeze because I just know that day is coming in February, after it has finally snowed in Baltimore (and the entire city freaks out about it because apparently we don’t know how to deal with snow even though it has been happening since forever), and I trudge home from a day of work and what promises to be a hellacious wintry commute…I will want this little piece of healthy comfort. Know thyself, Foodies! This will happen to me.
NOTE: Pictured with it is a dab of my protein infused cranberry sauce. I froze that too. Quick tip: To freeze your homemade cranberry sauce, put them in ice cube trays to freeze, then pop them out of the trays and into a freezer bag. Then you have a nice little portion to thaw when you want some cranberry goodness!
S’anyway…now I commission you. Go! Make this recipe! And if you play with it, send me pics!
(NOTE: As always, no, I am NOT giving you the nutrition information for this recipe. Here’s why. But a little bird tells me the folks at Celebrate Vitamins, who originally commissioned this recipe from me, figured it out for you and you can find those stats here!)
- 1 c. diced carrots
- 1 c. frozen peas
- 1/2 c. diced onions
- 1 tsp. minced garlic
- 16 oz. cooked turkey meat diced or shredded
- 1 c. cooked quinoa
- 10.5 oz. low-fat cream of chicken soup
- 1/2 c. skim milk
- 3 c. cauliflower florets or cauliflower rice
- Salt and pepper to taste
- 1 large egg
- 1/2 c. reduced fat shredded cheddar cheese
- 1/4 c. shredded Parmesan cheese
- 1 tsp. chopped parsley
- Preheat oven to 350 degrees.
- Spray a large skillet with non-stick cooking spray, set it over medium heat and allow it to get hot.
- Add carrots, onions, and peas. Cook 1-2 minutes (3-4 minutes if peas and carrots were frozen). Add garlic and cook an additional minute.
- Add diced turkey breast meat and quinoa, stirring to combine. Add cream of chicken soup and milk, stirring again. Allow the mixture to cook until it bubbles (mixture will be thick). Remove from heat.
- Cook cauliflower florets until tender (about 5-7 minutes). Drain of liquid, and then squeeze through a cheesecloth to remove excess water (or empty into a large strainer and press water out with a rubber spatula). Transfer to a mixing bowl.
- Add salt and pepper to cauliflower before adding egg and cheddar cheese. Mix thoroughly.
- Place meat/veggie mixture into a small casserole dish (8 x 8) and spread it out evenly. Top with cauliflower mixture, spreading it evenly on top. Finally, sprinkle with Parmesan cheese and parsley.
- Bake for 30 minutes or until "crust" is done and browned to your liking.
 Bariatric Foodie Play with your food


I want that NOW! Since I’m certain that I’ll never get my hubby to even touch the stuff (he absolutely swears that cauliflower is the food of the devil), I think I’ll pick up a batch of mini pie tins and make this for direct to freezer action!